Jade rollers, LED masks, microneedling devices…there are so many skincare tools on the market these days, it’s hard to keep them straight. What does it do and how do I even use it? Does it actually work? Is it really worth several paychecks? These are the questions that continuously pop in our heads as we browse through the tool section.
Dermaplaning is no exception. You may have come across this exfoliating device before; it’s admittedly difficult to peel your eyes away from the oddly satisfying videos showcasing how much dead skin and facial hair this mighty tool can shave away. But we get it—hopping on the dermaplaner train can be a bit more intimidating than trying a new serum or night cream. Enter: Our complete guide to dermaplaning. With the help of estheticians Suyud Issa and Nancy Reagan, we answer all your questions about the tool below, including how to do it, what results you can expect, and whether your hair will grow back thicker (hint: it won’t).What Is Dermaplaning?
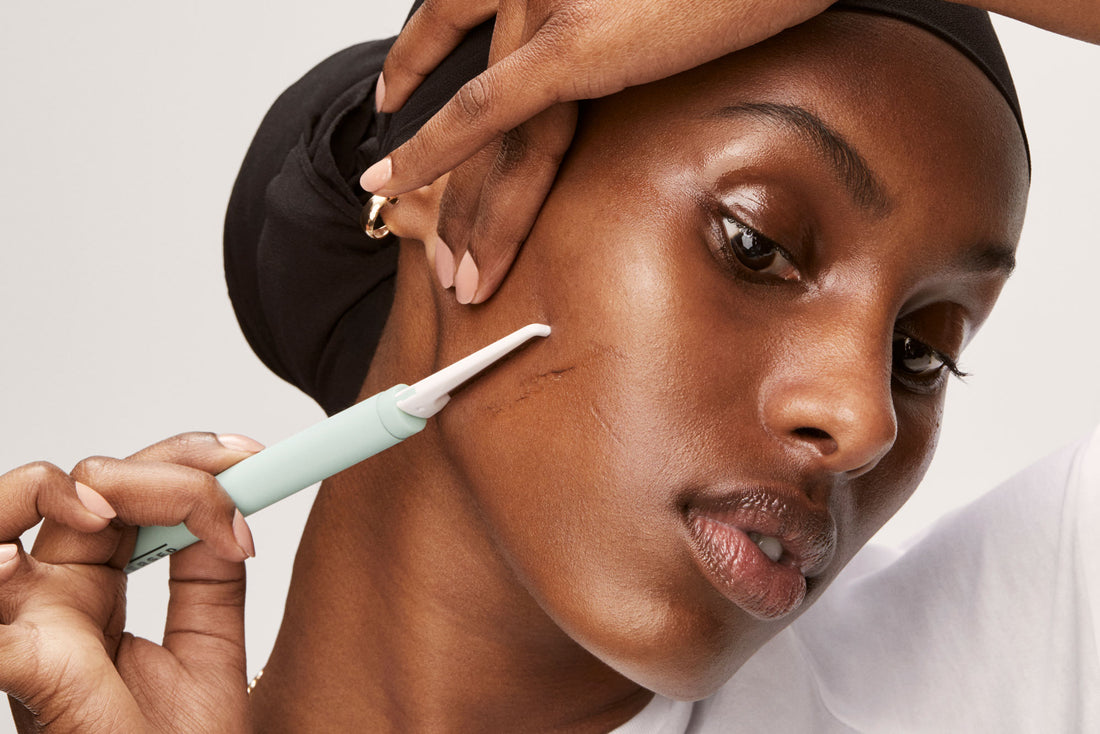
Dermaplaning is a type of physical exfoliation where you use a scalpel to remove dead skin cells and facial hair from the top layers of skin. It can be done in-office by a professional or you can choose to do it at home. Dermaplaning isn’t your average scrub or chemical exfoliant, but you can expect a lot of similar results such as a brighter complexion, more even tone, smoother texture, and fewer breakouts. “It removes dead skin cells and facial hair which helps skin look brighter and feel smoother”, says Suyud. It also “doesn’t traumatize the skin because it’s non-invasive.”
What really sets dermaplaning apart, however, is that it also removes the vellus hairs (a.k.a. peach fuzz) that stand between your skin and your products, allowing them to penetrate deeper and work more effectively. And by ‘products’, we mean makeup, too—all your creams and powders will apply much more seamlessly and flawlessly without any splotches or patchiness. That’s why Nancy enjoys dermaplaning before an event or celebration. “Makeup simply glides over the newly exfoliated skin. There is no hair to cover; makeup only adheres to the skin and not the hair for a perfect application.”
Another plus is that dermaplaning produces results instantaneously. Skin texture will be the smoothest it’s probably ever felt (seriously, there’s nothing more satisfying than running your fingers across your baby soft skin afterward). “If your skin concerns are dull and dry skin, congested pores, hyperpigmentation, acne scars, fine lines and wrinkles, then you’ll benefit greatly from dermaplaning”, says Suyud. Nancy adds that dermaplaning is made for all skin types and is especially “good for pregnant or nursing women who want to exfoliate, but don’t want to risk a chemical peel.”
How to Dermaplane At Home
We get it: running what looks like a scalpel across your skin sounds intimidating. But done correctly, dermaplaning is very safe and simple to do from home. Follow these step-by-step instructions (you can also watch our how-to video). 
Step 1: Wash and dry your face. Keep skin clean and free from any serums or oils.
Step 2: Grab your At-Home Dermaplaning Tool, remove the safety cap, and hold skin taut with your free hand. You’ll be focusing on your cheeks, chin, upper lip, and forehead (avoiding eyelids, eyebrows, lips, nose, acne, and any broken skin).
Step 3: Holding the blade at 45-degree angle, glide the dermaplaner down along the contours of your face in short, gentle strokes. On cheeks, move in toward the center of your face. On the forehead, upper lip, and chin, move down toward your jawline. Move extra carefully around the hairline and eyebrows and tuck in your lips when dermaplaning the upper lip and chin. Just like regular shaving, there’s no need to apply any pressure.
Step 4: Using a damp towel, Reusable Cotton Pad, or facecloth, remove any buildup on the blade between each section. Avoid going over an area more than twice.
Step 5: Give the blade a final swipe (you can also choose to disinfect it with rubbing alcohol), replace the safety cap, and restore hydration by immediately applying a serum, moisturizer, or facial oil (we recommend Sunday Morning). Enjoy the soft, glowy results immediately.
Common Dermaplaning Questions, Answered
How often should I dermaplane?
Depending on your skin type, concerns, and how much facial hair you have, we recommend dermaplaning once every 1-3 weeks as the second step in your routine after cleansing. Don’t overdo it—too much exfoliation can damage your skin. And don’t combine dermaplaning with chemical exfoliation. Hold off on acid-based products for 24 hours before and after using the tool. You can apply retinol after dermaplaning, but if you have sensitive skin we recommend waiting a day or performing a patch test first.
Will I cut myself?
Dermaplaning is completely safe but, like handling anything with a sharp edge, you should move slowly and pay close attention to avoid accidentally nicking yourself. Good blades are important here, too. Nancy tells us that the “key to not cutting yourself is using the very best blades. The cheaper blades will have nicks and divots in the blades.” Instant Gratification uses single-edge, stainless steel blades with no sharp edges. Plus, its handle has a slip-free grip that’s designed for maximum control while being used. Always slide the safety cap back on after use for worry-free storage and disposal.
How often should I change the blade?
Every tool is different. Some are only designed to be used once before they should be thrown out, otherwise, they’ll dull (which is how we become more prone to accidentally nicking ourselves). Our At Home Dermaplaning Tool’s handle can be used again and again while each sterile blade lasts 3-4 uses without dulling. Once you’re done with it, replace the safety cap and toss in the trash. Stock up by buying a 3-Blade Refill Pack.
Won’t my hair grow back thicker?
Nope—that’s a complete myth that was actually busted back in the 1920s (it’s about time we let go of that idea, shall we?). “The growth and density of the hair are not affected by dermaplaning”, Nancy agrees.
What’s the difference between a razor and a dermaplaner?
Both practices may be referred to as ‘shaving your face’ but dermaplaning and shaving aren’t exactly interchangeable. The blades on razors and disposable eyebrow shavers are only meant to remove facial hair and cannot slough away dead skin cells like dermaplaning can. Our At-Home Dermaplaning Tool uses surgical, single-edge blades with fewer blade guards than regular shavers, delivering a closer, better exfoliation.
I’m acne-prone. Can I still dermaplane?
Those with acnenic skin can definitely benefit from dermaplaning as the exfoliation helps remove dead skin cells that can otherwise clog pores. Dermaplaning over an active breakout or broken skin, however, is not a great idea as you can infect the area and spread bacteria. Avoid those areas while dermaplaning or simply wait for skin to clear up a bit first. Watch out for cystic acne, raised bumps, or skin tags, too, says Nancy.
Shop your dermaplaning routine below.
